We have previously explained how to create a sprite sheet and tile sheet and convert them into the format used by Reality. We have also given an overview of the map tool. Now we are going to start pulling together our sprites and background to create some in game action.
The first thing we need to know about is zones. Each screen can have up to four zone areas where certain events can take place. For this example we are going to explain how to use zones to move the main character to a different location e.g. entering a house via a door.
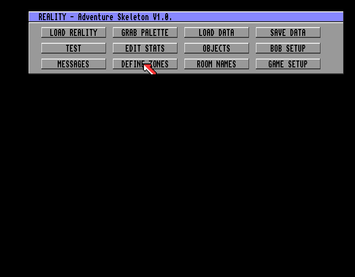
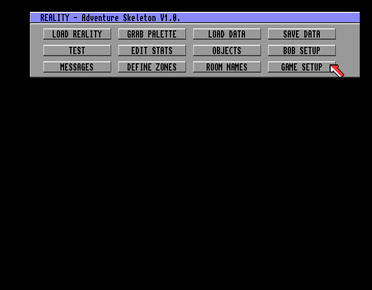
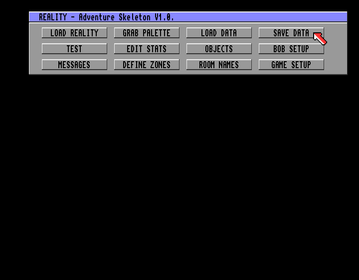
What you need to do is load the Reality game disk - then from the main menu select Edit Skeleton Disk. Once the skeleton disk is loaded you should have the 12 option menu screen shown below and you need to select Define Zones.
The first thing we need to know about is zones. Each screen can have up to four zone areas where certain events can take place. For this example we are going to explain how to use zones to move the main character to a different location e.g. entering a house via a door.
What you need to do is load the Reality game disk - then from the main menu select Edit Skeleton Disk. Once the skeleton disk is loaded you should have the 12 option menu screen shown below and you need to select Define Zones.
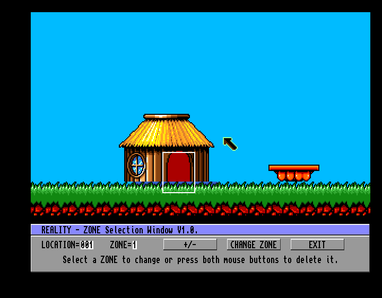
You will then be asked to select a location. You need to remember you map screen, in this example, I am going to creating a zone around a door in location 1 which will take me to location 8.
To select a location, use the left mouse button to increase the number and the right mouse button to decrease the number.
To select a location, use the left mouse button to increase the number and the right mouse button to decrease the number.
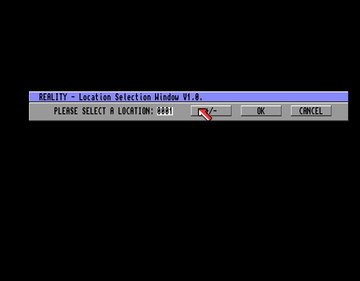
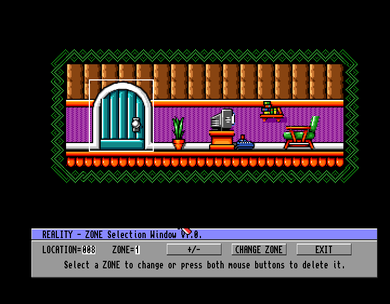
Once you have chosen your required location select ok. This will then take you to a screenshot of how your location currently looks.
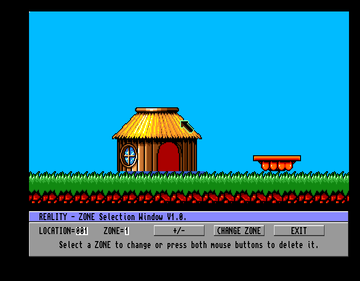
What we want to do is to draw a zone around the door, so that when the player activates this zone something happens - in this case they move inside the house.
To draw the zone, you select change zone. You are then asked to select the top Left corner of the zone with the left mouse button. In this example we want the top left corner to be the top left corner of the door.
To draw the zone, you select change zone. You are then asked to select the top Left corner of the zone with the left mouse button. In this example we want the top left corner to be the top left corner of the door.
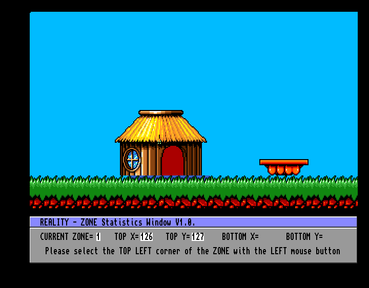
Having selected the top left area we are now asked to select the bottom right corner of the zone. For my game this isn't the bottom right corner of the door but extends down on the ground level. I have one block which of grass which is background rather than solid platform, so I must make sure that the zone extends to where the main character will be walking.
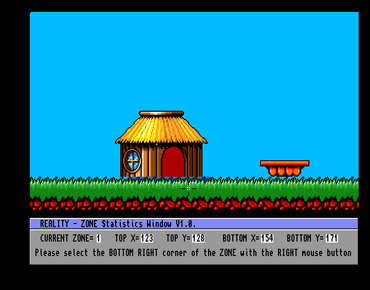
Once you have selected the bottom right corner the zone will appear as a white border.
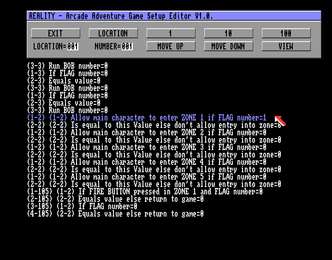
We have now successfully created our first zone for room one, but we now need to tell Reality what we want to happen when the player enters this zone. To do this we need to select exit from the Zone Selection Window and return to the main Skeleton Disk menu. From there we will select Game Setup.
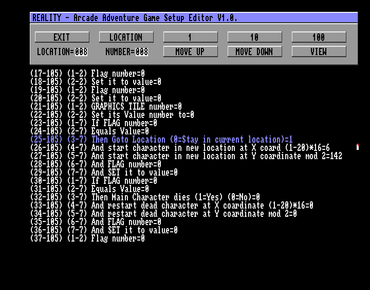
This is menu looks very confusing, and I am still working through the options to understand how everything works. Basically this menu allows you to specify how all the puzzles, objects, zones and other stuff interact with your player.
The zones could be automatically activated by when the player walks into the area or alternatively the zone may only be activated if the player presses the fire button.
To keep things simple, all you need to worry about at moment, is that you need to select the correct location.
To select a location click on the location option.
To increase the location number click on the location option with your left mouse button. To decrease the location number click on the location option with your right mouse button.
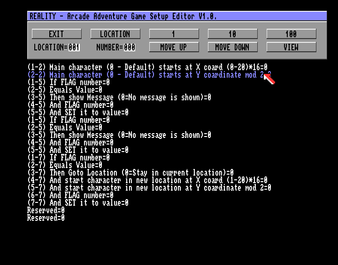
What you need to do now is use the move down option to scroll down the options until you get to the part which shows whether the player can enter zone 1, Zone 2, Zone 3 etc.
We are interested in Zone 1 and we need to change the 0 to 1. To do this move your mouse over the relevant line and click the left mouse button. Remember the number at the top must be showing 1. To change the number click on the 1 button with your left mouse button to increase the number and use the right button to decrease the number.
We are interested in Zone 1 and we need to change the 0 to 1. To do this move your mouse over the relevant line and click the left mouse button. Remember the number at the top must be showing 1. To change the number click on the 1 button with your left mouse button to increase the number and use the right button to decrease the number.
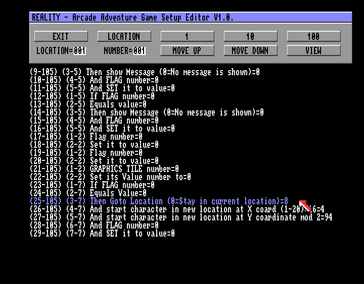
What we now need to do is tell Reality what location we want the player to be transported to. To do this scroll down the options again until you get to the option which says Then Goto Location (0=Stay in current location)=0.
What you need to do is change the number to the location you want the player to move to, in our case 8 as we want the player to move to room 8.
What you need to do is change the number to the location you want the player to move to, in our case 8 as we want the player to move to room 8.
What you now need to do is repeat the same process for room 8,
You need to go back to the Define Zones tool from the main option screen from the skeleton disk.
Select room 8 and Draw a zone around the door.
You need to go back to the Define Zones tool from the main option screen from the skeleton disk.
Select room 8 and Draw a zone around the door.
You then need to go back to the Game Setup tool from the main option screen from the skeleton disk.
Remember to change the Flag for Zone 1 to = 1 for location 8
Remember to change the Flag for Zone 1 to = 1 for location 8
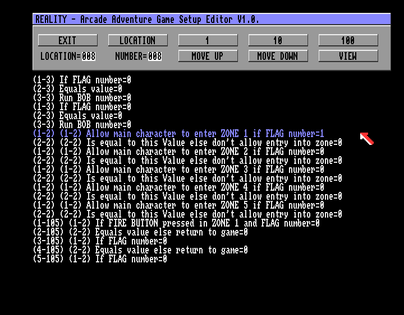
Remember to change the Goto Location option to location 1.
Lastly remember to save your data by selecting Save Data from the main menu from the skeleton disk.
Everything now should be complete for you to test the game. You may need to do some minor amendments to the start location of your character.
In this example I've amended the start location as X = 4 and Y=94
In this example I've amended the start location as X = 4 and Y=94

Below is a video showing the game after the tutorial is completed.