In this tutorial we are going to look at adding enemies to rooms. We do this by editing Bobs.
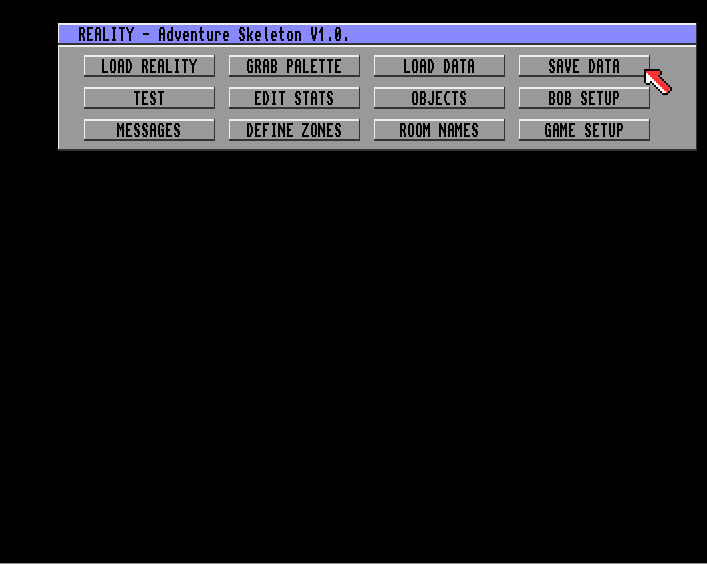
The first thing to do is load up the skeleton disk and from the main menu select Bob Setup.
The first thing to do is load up the skeleton disk and from the main menu select Bob Setup.
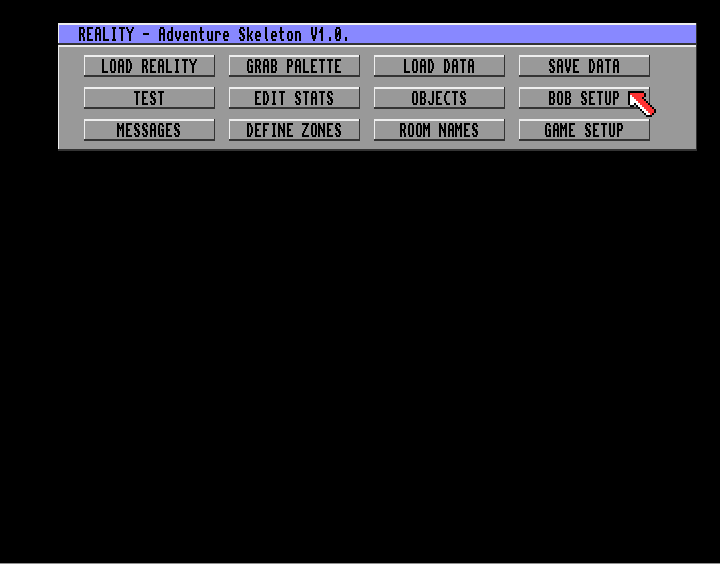
Bobs are the special objects for the game. They are mainly used for enemies but can also be used to provide animated static background items e.g. torches or waterfalls.
In this example we are going to use the bob setup to create an animated horizontal rat baddie.
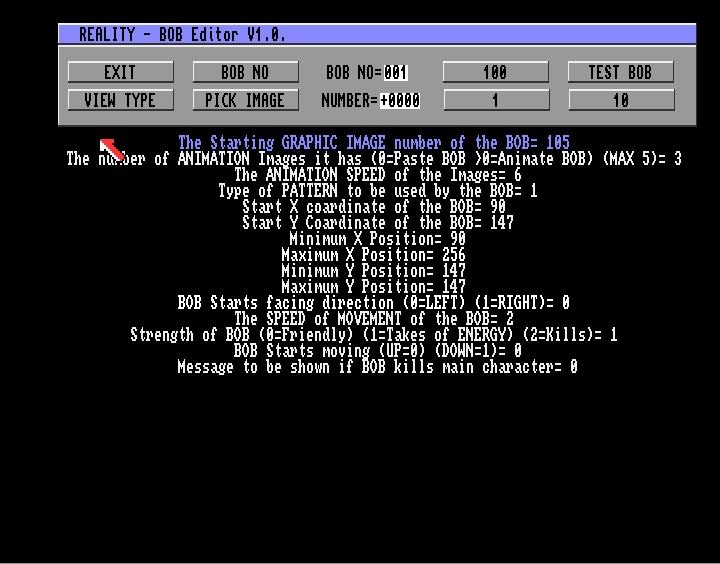
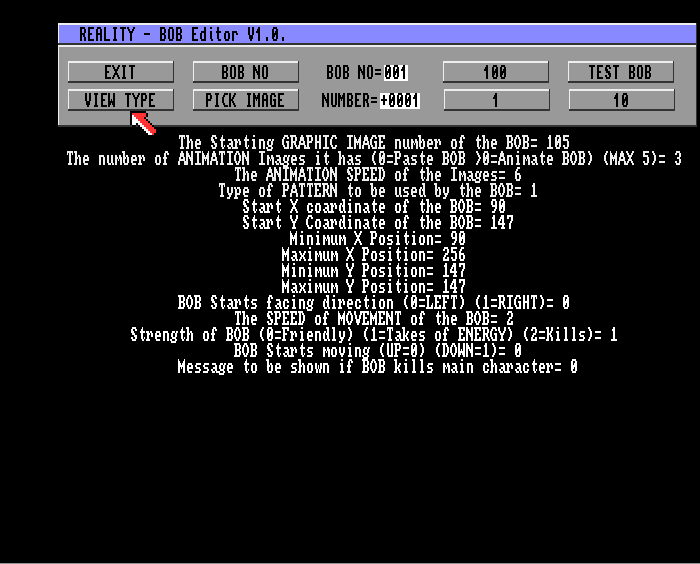
Selecting Bob Setup will take you to the Bob Editor as shown below.
In this example we are going to use the bob setup to create an animated horizontal rat baddie.
Selecting Bob Setup will take you to the Bob Editor as shown below.
The first thing we need to do is locate the graphic image we want to use. To do this click on Pick Image and this will take you to a screen where you can scroll through your graphics.
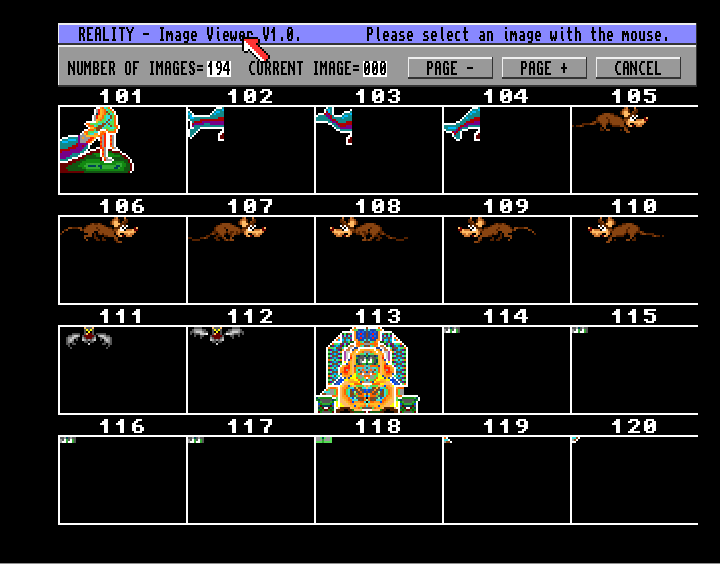
The sprite we want to use is the rat sprite. This starts at sprite number 105 and has 3 frames of animation for movement to the right and 3 frames of animation for movement to the left.
The next option is The number of ANIMATION images - if you want a static animated item such as torches, you would select 0 - for the rat, we need to select 3 as the rat has 3 frames of animation for each direction - the maximum any bob item can have is 5.
The next option is to set the Animation Speed - This determines how fast the sprite is animated - a speed of 6 seems to work quite well and is the default setting we are using. Lower speeds makes the animation routine run faster whilst higher numbers makes the animation run slower.
If you want to experiment, change the speed and then select Test Bob this will enable you to test the bob in any of your rooms - you are first asked to select the location / room you want to test the bob in.
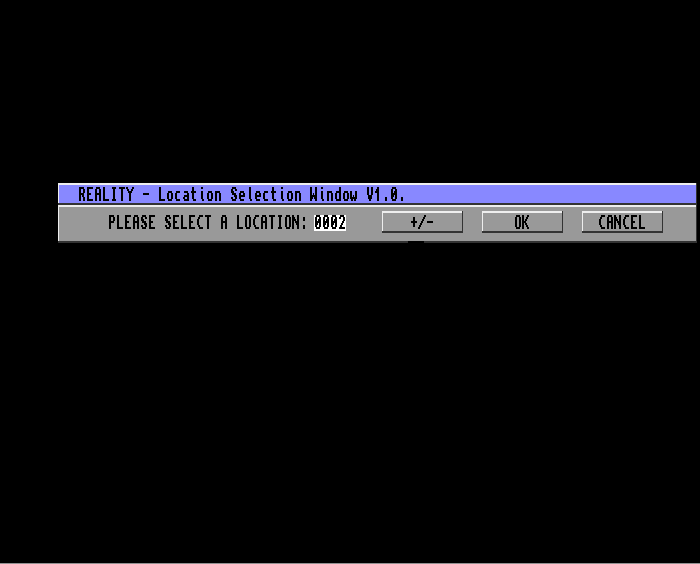
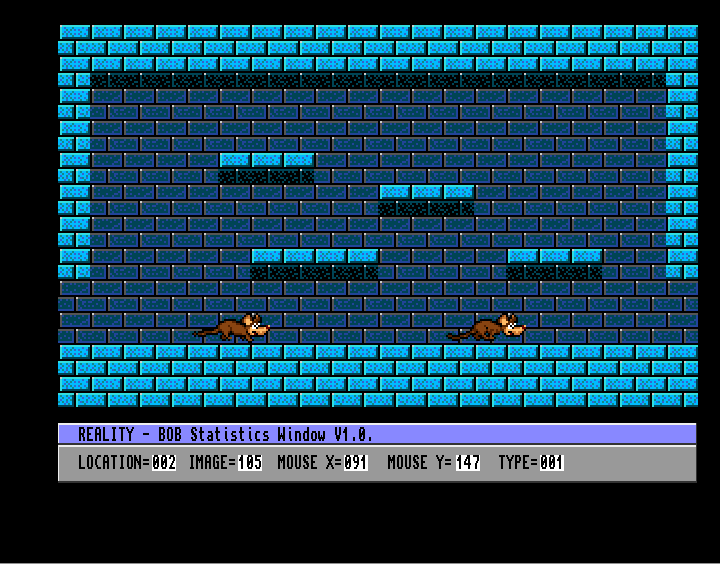
We are going to place the rat baddie in room 2 so we are going test the rat bob in this location.

When you are taken to the screen, you will have two bobs showing - one which you can move and one which is moving automatically.
At this stage you are just checking animated speed and not looking to change the bobs movement - if you are happy with the animation spped and want to exit press the left mouse button. Pressing the right mouse button will overwrite the start position of the bob, in the above picture I would be overwriting the pattern where the bob is running along the ground to a starting position where it would start below the ground level which is clearly something I don't want to do at this moment in time.
Returning to the Bob Editor we now have to decide on the type of (movement) pattern.
There are nine choices to select from as shown below.
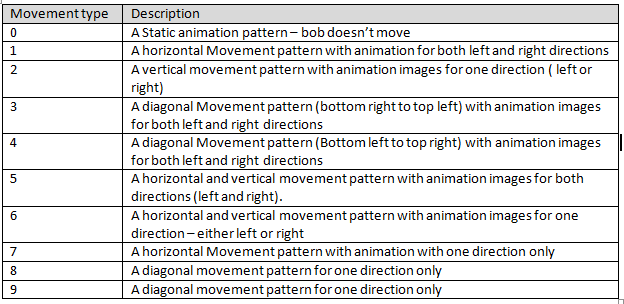
We want the rat to move in a horizontal direction, changing its animation for both left and right direction.
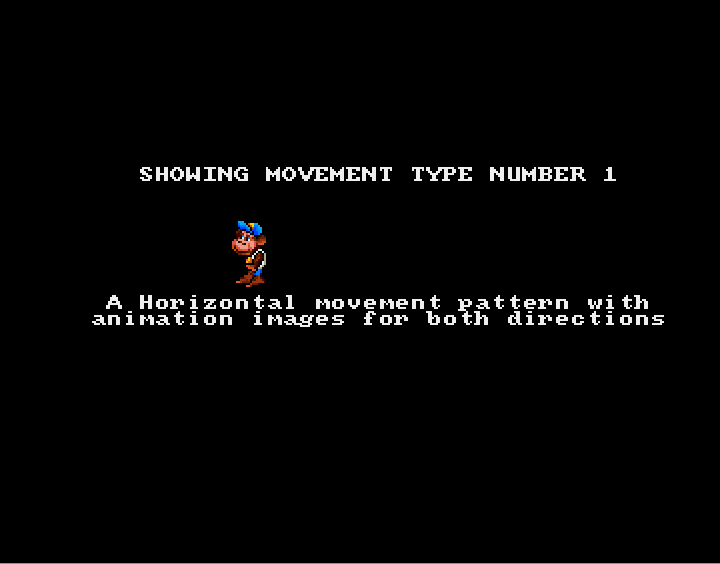
If you want to check the animation direction routine then from the Bob Editor menu select View Type. You need to remember that it will show the animation direction routine for the current number showing in the grey box and not the one list against Type of Pattern to be used by the bob.
If you want to check the animation direction routine then from the Bob Editor menu select View Type. You need to remember that it will show the animation direction routine for the current number showing in the grey box and not the one list against Type of Pattern to be used by the bob.
When you click on View Type you will be taken to another screen where Charlie Chimp will show you how the bob will move along with a short description of the movement type.
We are nearly finished with adding our rat to room 2. All we need to do now is work out the start position and the distance the rat can move. What I normally do is have a pen and paper handy and make a note of the relevant X and Y co-ordinates for start position - furthest distance to the left and right the bob can move to and the furthest distance the bob can move vertically.
The first location we want to set is the start position - it is generally a good idea to have the baddie starting in the middle of the room rather than near the sides where the player can enter. For the start position, if you exit the test bob screen by pressing the right mouse button then reality will automatically set the start position to that of where the moveable sprite was when you exited the screen. In the example below the start position would be overwritten to X - 091 and Y=147
The first location we want to set is the start position - it is generally a good idea to have the baddie starting in the middle of the room rather than near the sides where the player can enter. For the start position, if you exit the test bob screen by pressing the right mouse button then reality will automatically set the start position to that of where the moveable sprite was when you exited the screen. In the example below the start position would be overwritten to X - 091 and Y=147
Now its a case of selecting the furthest location the bob will move to the left minimum X position and the furthest location the bob will move to the right maximum X position. Again you may want to leave some space for the player to hide at the edges of the screen, rather than having your enemies moving to the extreme end of the left / right hand sides of the screen.
Now you have to select the furthest location the bob will move vertically. The highest position is shown by Minimum Y position and the lowest position vertically the bob can move is shown by maximum Y position.
The next option is to select whether you want the bob to start facing in a left or right direction.
If you select 0 the bob will start facing left and will begin moving to the left. If you select 1 the bob will start facing right and will move to the right first before then moving in the opposite direction.
Now we have to select the speed of movement of the bob - The higher the number the faster the bob will move - 2 is a good default speed for baddies - 8 is ridiculously fast, but feel free to experiment.
Now we have to set the strength of the baddie, which basically states whether the baddie will harm our player by taking some energy (set number to 1, or whether it will kill the player instantly, set the number to 2 or is friendly and causes no damage, set number to 0. For our rat we want to set the variable to 1 to reduce the player's energy if it collides with the rat.
Next you have the option to select the direction, vertical moving baddies will start moving in - set this to 0 for upward moving baddies and to 1 for downward moving baddies. The rat is a horizontal moving bob so we don't need to worry about this.
Lastly, you can select a particular message to be shown, if the player dies as a result of hitting the bob. Just select the number which relates to the message number you want displayed.
Once,everything is set as you want, Exit the Bob Editor. Then from the Reality Adventure Skeleton main menu select Save Data. If everything has gone as planned, you should have now added a bob / baddie to one of your rooms.
Overall, this has to be one of the easiest game creator kits I have used to add attack pattern and enemies to a game map.
The next tutorial may either look at objects in more detail or look at modifying the game information screen (currently shown at the bottom of my DM game).
The next tutorial may either look at objects in more detail or look at modifying the game information screen (currently shown at the bottom of my DM game).